
Intro do Data Science with Python

· 10 min read

The Data Processing Pipeline

  1. Acquisition
  2. Cleansing
  3. Transformation
  4. Analysis
  5. Storage

Acquisition

The process of loading needed data into the first stage of the pipeline to be used later down the line.

Cleansing

Process of detecting and crrecting corrupt or inaccurate data, or removing uncesessary data.

Transformation

The process of changing the format or structure of the data for analysis. Example: NLP (natural language processing) tools can handle taking a phrase or large text and shredding it into individual words. Other types of transformations like sentiment analysis also exist. It is a text processing technique that generates a number that represents the emotions expressed within a text.

Analysis

Raw data is intepreted to draw conclusions.

Storage

Results generated from analysis need to be stored somewhere. This is typically a file or database.

The Pythonic Way of Data Pipelines

"Pythonic" is an programming ideology that surrounds how Python code should be written. I dont care for it, but its worth understanding.

What makes code pythonic?

  1. Concise
  2. Efficent (that's rich)
  3. Leverages list comprehensions

Example: Multiline Fragment of Text Processing

txt = ''' Eight dollars a week or a million a year - what is
the difference? A mathematician or a wit would give you the
wrong answer. The magi brought valuable gifts, but that was
not among them. - The Gift of the Magi, O'Henry'''

We need to split the text by sentences, creating a list of words for each sentence not including punctuation.

word_lists = [[w.replace(',','') for w in line.split()  if w not in ['-']]
for line in txt.replace('?', '.').split('.')]
  1. The for line in txt loop splits the text into senctences by parsing on the period after replacing any question marks with a period.
  2. The sentences are then stored in a list.
  3. Then for w in line loop splits each sentence into individual words and stores them into a larger list.

We should get something like this:

[['Eight', 'dollars', 'a', 'week', 'or', 'a', 'million', 'a',
'year', 'what',
'is', 'the', 'difference'], ['A', 'mathematician', 'or',
'a', 'wit',
'would', 'give', 'you', 'the', 'wrong', 'answer'], ['The',
'magi',
'brought', 'valuable', 'gifts', 'but', 'that', 'was',
'not', 'among',
'them'], ['The', 'Gift', 'of', 'the', 'Magi', "O'Henry"]]

This accomplished data cleaning and transformation. We cleaned the punctuation then normalized the data into a form we wanted (a list of list of words).

Python Data Structures

Lists

Lists are ordered collections of objects (its all objects in Python). Objects are separated by commas and enclosed by brackets. Typically, and Pythonically speaking, lists are inteded to store homogenous data, or data that is related and of the same type. Below we can see lists can hold different objects of different types:

my_list = ['hey', 12, 'how are you', 'c']

They are mutable. So we can add whatever whenever we want to the list.

List Methods

Since lists are are objects in Python, we have some methods to interface with the list.

  1. list.append: Add an object to the end of the list
  2. print(list[i]): Print the data at the i position (not really a method of the list object, but whatever)
  3. list.index(object): Get the index of an object in a list
  4. list.insert(i, object): Insert object at i index
  5. list.count(object): Get the count of object in list
Slice Notation

Lists can be sliced into parts or slices. The slice is a list itself. For example, to print the first three objects in the list using a slice:

print(list[0:3])

This will print the 0th, 1st, and 2nd items in the list. Not the 3rd! The end and end indices in a slice are optional.

  1. print(list[:3]): Same as before and will print the first 3 objects.
  2. print(list[3:]): Print the 3rd item and every item following in the list
  3. list[len(list):] = [Object1, Object2]: Add two more objects to the end of the list
  4. del list[5:]: Removes everything with indices 5 and above

List as a Queue

A queue is a data structure that follows first in first out. One end of the queue adds data (enqueue) and the other end removes data (dequeue).

from collections import deque
queue = deque(my_list)
queue.append(1)
print(queue.popleft(), ' - Done!')
list_upd = list(queue)

When calling the construtor of the queue object on a list, the list is has methods specific to the queue class added to the list object. We then add 1 with the append() method, then we remove by calling the popleft() method. It removed the left most item (or the smallest index) and returns it so we can print it with the appended done.

List as a Stack

A stack is similar to a list but data is added and removed in a first in last out approach or last in first out.

my_list = ['Pay bills', 'Tidy up', 'Walk the dog', 'Go to the pharmacy', 'Cook dinner']
stack = []
for task in my_list:
stack.append(task)
while stack:
print(stack.pop(), ' - Done!'))
print('\nThe stack is empty')

There is not stack data structure in this example, but we can get the same utility as a stack from a list using methods like append and pop. A new list is allocated called stack and then for each item in my_list, we append to the stack. Data is then popped off the stack until it is empty and the chores are done.

Lists in NLP

A list and stack can be used to extract all the noun chunks from a text. Words to the left of the noun are dependent on the noun like adj or determiners.

Tuples

Like a list, tuples is a collection of ordered objects. They are immutable. They are typically used to store heterogenous data or data of different types. It is very common to nest tuples in lists.

task_list = ['Pay bills', 'Tidy up', 'Walk the dog', 'Go to the pharmacy', 'Cook dinner']
tm_list = ['8:00', '8:30', '9:30', '10:00', '10:30']

# We can iterate and build the tuple for each item in the task_list
time_task_list = []
for i in range(len(tasks_list)):
tuple = (tm_list[i], tasks_list[i])
time_task_list.append(tuple)

# Or we can use zip
schedule_list = [(tm, task) for tm, task in zip(tm_list, task_list)]

print(schedule_list[1][0])

Using the zip function is more "Pythonic", but it feels like I should iterate to have explicit control, but what do I know? We can also print the second tuple in the list and the first object in the tuple using print(schedule_list[1][0]).

Dictionaries

Dictionaries store key-value pairs, are mutable, and each key is unique. For example, {'Make': 'Ford', 'Model': 'Mustang', 'Year': 1964}. We can also leveage the list class by appending dictionaries into a list:

dict_list = [
{'time': '8:00', 'name': 'Pay bills'},
{'time': '8:30', 'name': 'Tidy up'},
{'time': '9:30', 'name': 'Walk the dog'},
{'time': '10:00', 'name': 'Go to the pharmacy'},
]

# We can change data inside the dictionaries
dict_list[1]['time'] = '9:00'

setdefault() with Dictionaries

This method provides an easy way to add new data to a dictionary. It takes a key-value pair as the parameter. If the pair already exists, the method returns the value of that key. If the key does not exists, the pair is inserted.

Example: Counting Word Occurrences in NLP
txt = ''' Go is a better language than Python. There is not a thing you can say to
convince me otherwise. You YOU YOU YoU 1 2 3 1 2 3 4 21 11 11 1 1 1 1'''

# Separate all words with a space
txt = txt.replace('.',' ').lower()

# Store in list
word_list = txt.split()

# Distinct count of words
word_counts = {}
# Iterate over the list and look at each word
for word in word_list:
# For each word, setdefault to 0 if not already in the dict
word_counts.setdefault(word, 0)
# Add one to the value mapped to the key (word)
word_counts[word] += 1

print(word_counts)

sorted_word_counts = sorted(word_counts.items(), key=lambda x: x[1], reverse=True)

print(sorted_word_counts)

Sets

A set is an unordered collection of unique items. No duplicates. It is defined with curly braces.

random_set = {'America', 'Russia', 'Guam'}

A good use case for sets is casting a list to a set and back to a list to remove duplicates.

lst = [1,2,3,1,1,1,2,3]
lst = list(set(lst))
print(lst) # 1 2 3

The order is not preserved. The list can be sorted.

lst = list(sorted(set(lst), key=lst.index))

Data Science Libraries

Why write all of the code when someone else has done it all already?

Numpy

The Numeric Python Library is nice when working with arrays. A majority of other data science libraries rely on Numpy.

The array is a grid of element of the same type. They are indexed by a tuple of nonnegative integers. They allows for element-wise operations. An element-wise operation is operating on two arrays of the same dimmensions that produce another array of the same dimmensions.

image

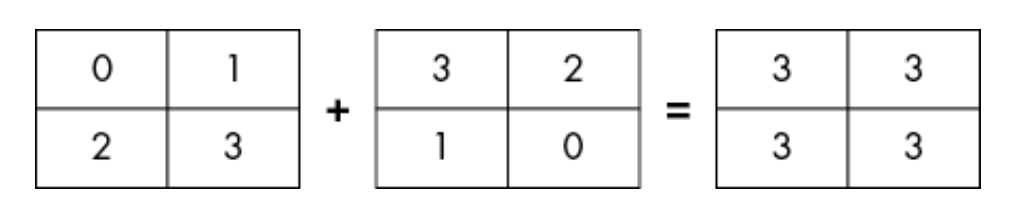
The result array has the same dimmension. The operations are precompiled C code which allows faster execution.

Creating a NumPy Array

import numpy as np

data_1 = [1, 1, 1]
data_2 = [2, 1, 0]
data_3 = [100, 1, 1]

combined_data = np.array([data_1, data_2, data_3])
print(combined_data)

""" Output
[[ 1 1 1]
[ 2 1 0]
[100 1 1]]
"""

A set of lists are passed to the array constructor that are then used to build a 2D numpy array. What happens when the lists are not balanced? Let say we cut the last 1 out of the last list.

ValueError: setting an array element with a sequence. The requested array has an inhomogeneous shape after 1 dimensions. The detected shape was (3,) + inhomogeneous part.

We can see the interpreter raises a value error. The detected shape should of had 3 elements. What about if we pass a list of strings instead of a list of ints?

data_1 = [1, 1, 1]
data_2 = [2, 1, 0]
data_3 = ['1', '1', '2']

""" Output
[['1' '1' '1']
['2' '1' '0']
['1' '1' '2']]

Kinda weird. We can tell numpy how to handle the conversion.
"""
combined_data = np.array([data_1, data_2, data_3], dtype=int)

# When we specify the type as an int, np will convert all elements to an int.
# NOTE: Converting a string like "sample" can not be handled by numpy and will result
# in a value error.

Pandas

Dataframes are similar to 2D vectors. They can be used to store data similar to a table.

Combining Dataframes

Pandas allows us to merge or join data frame. The syntax is very similar to SQL. If we have a one to one merge, we can rely on the shared indexes between two tables:

emps_salary = emps.join(salary)
print(emps_salary)
Different Types of Joins

Joining index to index is the default behavior. We can get different types of joins passing a how parameter into the join function.

# Inner
emps_salary = emps.join(salary, how='inner')

# Orders
data = [[2608, 9001,35], [2617, 9001,35], [2620, 9001,139],
[2621, 9002,95], [2626, 9002,218]]
orders = pd.DataFrame(data, columns = ['Pono', 'Empno',
'Total'])

emp_orders = emps.merge(orders, how='inner', left_on='Empno', right_on='Empno').set_index('Pono')

Aggregating with groupby()

In pandas, we can groupby similar to SQL.

We can apply a aggregate function like mean() to a column Total and groupby Empno

print(orders.groupby(['Empno'])['Total'].mean())

Probability for Machine Learning

· 2 min read

What is Probability

Blog Reading: https://machinelearningmastery.com/what-is-probability/

  • Uncertainty: Imperfect or incomplete information
  • Probability: A measure that quantifies the likelihood that an event will occur.

It can be calculated by dividing the count of all of the occurrences of the event by the total possible occurrences.

p = occurences / (non-occurrences + occurrences)

Probability Theory

  • Def: Provides a framework for quantifying uncertainty and making predictions about the likelihood of various outcomes.

Basic Concepts

  1. Experiment: An action that leads to one or more outcomes. Like rolling a die or flipping a coin.
  2. Sample Space (S): The set of all possible outcomes of the experiment. For dice: 6
  3. Event: A subset of the sample space. An event can consist of one outcome or multiple outcomes. For example, rolling an even number: 6
  4. Probability (P): A measure of the likelihood of an event occurring, expressed as a number between 0 and 1.

Key Principles

  1. Addition Rule: For two mutually exclusive events A and B, the probability of either A or B occurring can be expressed:
P(A∪B)=P(A)+P(B)
  1. Multiplication Rule: For two independent events A and B, the probability of both A and B happening can be expressed:
P(A∩B)=P(A)×P(B)
  1. Conditional Probability: The probability of an event A given that B has occurred:
P(A∣B)=P(B)P(A∩B)​

Frequentist vs Bayesian Interpretation

  • Frequentist: Probability is defined as the longrun relative frequency of an event occurring in repeated independent trials. For example, if a coin is flipped many times, the probability of getting heads is interpreted as the limit of the proportion of heads observed as the number of flips approach infinity.

  • Bayesian: Probablility is a measure of belief or certainty about an even, given prior knowledge or evidence. It allows for context or new insights taken from new data.

Configuring ML Server - Fedora

· One min read

In order to send CSV and log data over SCP, we need to enable the openssh service and enable a secure connection from the log server (Raspberry Pi)

Ensure SSH Server is Installed

sudo dnf install openssh-server -y

Ensure the SSH Service is Running (Systemd)

sudo systemctl enable --now sshd
sudo systemctl status sshd

The output should look something like this if the service is up and running:

Image

Set Up SSH Keys

On the logserver, generate an rsa SSH key and copy it over to the ML host:

ssh-keygen -t rsa -b 4096  # Press ENTER for all prompts
ssh-copy-id [email protected] # Copy the key to the remote machine

Testing SCP

Test SCP with a sample file to make sure files can be sent without authenticating. Here, I have a CSV file (file type does not matter) that contains a message that I sent over to the ML host.

Image

Verify the file has been sent over:

Image

Installation and Setup of Rsyslog on Raspberry Pi

· 2 min read

System Information

  • Device: Raspberry Pi 4
  • OS: Ubuntu 24.10
  • Logging Service: rsyslog
  • Listening Ports: TCP 514
  • Firewall: Configured to allow remote log collection
  • Storage: 1TB for log retention

image

TCP is the only protocol I used for a gurantee of log delivery.

1. Update the System

Ensure your system is up to date:

sudo apt update && sudo apt upgrade -y

2. Install rsyslog

Most Ubuntu installations come with rsyslog pre-installed. If not, install it using:

sudo apt install rsyslog

Verify that the service is running:

sudo systemctl status rsyslog

3. Configure rsyslog for Remote Logging

Edit the rsyslog configuration file:

sudo nano /etc/rsyslog.conf

Uncomment the following lines to enable TCP reception:

# Provides TCP syslog reception
module(load="imtcp")
input(type="imtcp" port="514")

Save and exit the file (Ctrl + O, Enter, Ctrl + X).

4. Configure Firewall Rules

If UFW (Uncomplicated Firewall) is enabled, allow the required ports:

sudo ufw allow 514/tcp
sudo ufw reload

5. Restart rsyslog

Apply the changes by restarting the rsyslog service:

sudo systemctl restart rsyslog

6. Verify Configuration

Check if rsyslog is actively listening on the correct ports:

sudo netstat -tulnp | grep 514

If done correctly, you will see listening ports open: image

If netstat is not installed, you can install it using:

sudo apt install net-tools

Technical Interviews

· One min read

I have been studying for technical interviews and I do not really know what to expect from these interviews. I assume there would be some coding exercises and maybe a system design question. I suck at LeetCode problems so I should probably do more of them.

Resources:

Youtubers:

System Design

· 5 min read

Bit.ly

Bit.ly is a URL shortener. This is a pretty common beginner systems question.

Steps for Designing

  1. Functional Requirements: What features must the system have to meet the needs of the user.
  • Core Requirements:
    • Users should be able to submit a long URL and receive a short one
    • Users should be able to access the original URL from the short one (Forwarding)
  1. Non-Functional Requirements: Features that refer to how the system operates and provides the functional features.
  • Short URLs should be unique
  • The redirect delay should be minimal
  • High availability (99.99% >)
  • The system should scale to 1 billion URLs and 100M DAU (Daily Active Users)

Setup

Core Entities -- What Are They?

Core entities represent the primary objects in our system. These are derived from our requirements. Examples can include "URL", "User", "Transaction" and so on. They often map directly to database tables but can also represent more abstract concepts as well.

When Are Entities Tables in a Database?

In a relatoional database design, more core entities will have corresponding tables.

  • Each table normally represents one entity (e.g, a "Users" table for the User entity) Some entities may not need direct table representation:
  • Derived or computed entities (e.g, an aggregated click count)
  • Temporary or in-memory entities used for processing only.
When Are They Not Tables?
  1. NoSQL Databases
  2. Microservices
  3. When Aggregating Data

The core entities for the Bit.ly URL shortener are:

  • Original URL: The URL from the user
  • Short URL: The shortened processes URL that is sent to the user and mapped to the original URL for forwarding
  • User: The user who created the shortened URL

API

What Is It?

The API is the contract between the client and the server. How we move data from client to server and vice versa. There are many different types of APIs, but we will use REST and the HTTP methods.

(CRUD)

  • POST: Create
  • GET: Read
  • PUT: Update
  • DELETE: Delete

Now before the APIs are built, we should consider the services offered and create a separation of concerns. There are actually two services being offered, a URL shortener and a forwarding service. One is incredibly reliant on the other.

Shortening The URL POST Endpoint

This API endpoint will take in the long URL as well as a custom alias and expiration date.

// URL POST
{
"long_url": "https://example.com/some/long/ass/path",
"alias": "short_alias",
"exp_data": "optional_expiration_data"
}
->
{
"short_url": "http://short.ly/abc"
}

Redirection

//Redirect to original URL
GET /{short_code}
-> HTTP 302 Redirect to the original URL recieved from the user.

High-Level Design

We start the design by going one-by-one through our functional requirements and designing single systems to meet them.

URL Shortener (POST)

The URL shortener core requirement should take a POST request from the user, compute a shortened URL (optional alias), and then store the record in the database.

image

  1. User: Interacts with the system via an API enpoint
  2. Server: Receives and processes the request from the client or user and handles all the logic like shortening the URL and validating it to already created URLs.
  3. Database: Stores the map of short codes to long URLs, along with the aliases and expiration dates.

When the system recieves a POST request from the user:

  1. The server recieves and validates the URL:
    • Use an opensource library to validate the the long URL
    • Queery the database to see if the long URL is already being forwarded from (record already exists)
  2. If the URL is valid and is not already in our database we generate a short URL and store in our database:
  3. Finally, we can return the short URL to our user.

Acess Original URL Via Short URL (GET)

Users should be able to access the original URL from the shortened URL.

image

When the system recieves a GET request from the user with a shortened URL:

  1. The server will lookup the short URL and verify that there is a match and it has not expired.
  2. If the URL is valid and has not expired, the server will respond with a 302 redirect what will point to the original long URL.

Some Scalability and Deep Dives

URL Uniqueness

I would imaging that using a hashing function would work. Adding a hash feature to the URL entity could make chaining possible. Especially if we use SHA-256 for optimal number of hashes.

Column NameData Type
URLVARCHAR(2048)
shortURLVARCHAR(255)
hashVARCHAR(64)
createdTIMESTAMP
expirationTIMESTAMP
createdByVARCHAR(255)

The next entry would have to read the previous entry's hash then incoporate that into computing its hash. This would create a chain. We could also add an authentiction server that stores hashes in a hashmap that can be quickly searched for verification purposes.

Scale to 1B Shortened URLs and 100M DAU

Scaling can be done simply. We can have a separation of concerns from the URL shortener service and the forwarding service. We can assume that less links will be made than they will be searched since 1 user can shorten a link and any one can use it to get to the original URL.

Scaling horizontally will make it easier if we separate our services out to different servers and architecture.

image

Exploring Go's Type System vs Rust

· 7 min read

I have been hearing a lot of hoopla about Rust's type system and how it is better than Go's from a bunch of crusty rustaceans. I realized that although I have used Go for some projects and really enjoy the language, I do not understand the type system as well as Python's and C's. I would like to do a deep dive, and compare Rust to Go from a beginner's perspective.

Primitive Type

Scalar Types

Integers

Rust

  • i8, i16, i32, i64, i128: Signed ints for different bit sizes
  • u...: the same thing but unsigned ints for different bit sizes
  • isize/usize: int types with architecture dependent sizing (used for indexing collections)

Go

  • int, int8, int16, int32, int64: Signed ints for different bit sizes
  • unint...: same as before but unsigned

Both languages have fixed-size ints for better control over memory.

Floats/Complex

Rust

  • f32,f64: 32 and 64 bit floating point numbers

Go

  • float32, float64: the same as Rust
  • complex64, complex128 floats that can represent real and imaginary parts

Boolean

Rust

  • bool: true and false

Go

  • bool: true and false

Char/Rune

Rust

  • char: a single Unicode scalar value (special characters/emojis as well)

Go

  • rune: a single Unicode scalar value or a surrogate pair outside the Basic Mutilingual Plane

It is important to note that the char in Rust is guranteed to be a valid Unicode scalar point, but the rune in Go can be any Unicode code point. They are both 4 bytes. Go's rune is more flexible and can represnt a wider range of Unicode code points, but you have to check the validity of the Unicode scalar point values.

Rust Example:

let valid_char: char = 'A'; // Valid Unicode scalar value
let invalid_char: char = '\uD800'; // Invalid Unicode scalar value (lone surrogate)

// This will compile without errors:
println!("{}", valid_char);

// This will result in a compile-time error:
println!("{}", invalid_char);

Go Example:

var validRune rune = 'A' // Valid Unicode code point
var invalidRune rune = '\uD800' // Invalid Unicode scalar value (lone surrogate)

fmt.Println(validRune) // Output: A
fmt.Println(invalidRune) // Output: 55296 (the numerical value of the invalid code point)

Composite Types

Composite data types are data types that are constructed from combinations of primitive data types. They allow you to represent more complex structures and relationships between data elements.

Arrays

Arrays in Go and Rust both work the same: fixed-size collectinos of elements of the same type. Both support slicing, and passed by value (Rust has ownership rules). Rust arrays are immutable by default but can be made mutable using the mut keyword. Go arrays are mutable by default, and does not follow strict borrowing rules. It can be modified freely unless passed as a parameter then it is passed by value and results in a copy being made.

Rust Example: Mutable Array

let mut arr = [1, 2, 3];
arr[0] = 10;

Go Example:

arr := [3]int{1, 2, 3}
arr[0] = 10

Go has a garbage collector so we do not need to worry about deallocating and cleaning up ourselves, unlike Rust. That being said, Rust does use the stack as the default storage for arrays. Arrays in Go are value types, meaning when we pass it to a function it will be copied unless we use pass by reference.

Slices

Slices in Go are dynamic views of arrays and more commonly used. Go slices are more related to vectors as they can grow and shrink in size as needed. In Rust, slices are references to the data they point to and they do not own the data. Their size is dynamic and determined at runtime.

Go Slice Example:

arr := [3]int{1, 2, 3}
slice := arr[1:]

Rust Slice Example:

fn main() {
let mut arr = [1, 2, 3, 4, 5]; // Mutable array

let slice = &mut arr[1..4]; // Mutable slice
slice[0] = 10; // Modify the first element of the slice
println!("{:?}", arr); // Output: [1, 10, 3, 4, 5]
}

Struct

Both languages support structs or groups related data. They differ in features, memory management (surprise!), and flexibility.

Go Example

// Simple struct
type Person stuct {
Name string
Age int
}

// Instantiation and usage
person := Person{Name: "Alice", Age:30}
fmt.Println(person.Name)
person.Age = 31

// Methods on structs
func (p Person) Greet() string {
return "Hello, " + p.Name
}

// Pointer and Mutability
func (p *Person) HaveBirthday() {
p.Age += 1
}

In Go, structs are passed by value. If we want to modify the data in the struct, we must use a pointer.

Rust Example

// Struct definition
struct Person {
name: String,
age: u32,
}

//Instantiation and usage
let person = Person { name: Sting::from("Alice"), age: 30}; // ugly ass syntax
println!("{}", person.name);
let mut person = person;
person.age = 31;

// Methods on structs
impl Person {
fn greet(&self) -> String {
format!("Hello, {}", self.name)
}
}

//Ownership and borrowing Methods
impl Person {
fn have_birthday(&mut self) {
self.age += 1;
}
}
FeatureGo StructsRust Structs
SyntaxFields and types are defined like normal variablesFields are defined with type annotations
MutabilityFields are mutable by defaultFields are immutable by default; mut required for mutation
Memory SafetyRelies on garbage collectionNo garbage collection; uses ownership and borrowing for memory safety
Default ValuesFields have zero values when not initializedNo default values; all fields must be initialized
MethodsMethods defined with receivers (value or pointer)Methods defined inside impl blocks with self
Struct CompositionUses embedding for inheritance-like behaviorNo inheritance; composition via traits
Passing by Value/ReferenceStructs are passed by value unless a pointer is usedStructs are passed by value unless a reference (&) is used
Memory ManagementStructs are garbage collectedRust structs follow ownership and borrowing rules
Trait ImplementationsNo built-in trait systemSupports traits for behavior reuse across types

OOP

Both languages are not object oriented in the tradditional sense. Rust still adheres to the core pricniples of OOP through traits. Go is also object oriented-like through the use of interfaces.

Go OOP Example with Interfaces:

type Animal interface {
Speak()
}

type Dog struct {
Name string
}

func (d Dog) Speak() {
fmt.Println("Woof!")
}

type Cat struct {
Name string
}

func (c Cat) Speak() {
fmt.Println("Meow!")
}

func main() {
dog := Dog{Name: "Buddy"}
cat := Cat{Name: "Whiskers"}

var animal Animal

animal = dog
animal.Speak()

animal = cat
animal.Speak()
}

Rust Example with Traits:

trait Animal {
fn speak(&self);
}

struct Dog {
name: String,
}

impl Animal for Dog {
fn speak(&self) {
println!("Woof!");
}
}

struct Cat {
name: String,
}

impl Animal for Cat {
fn speak(&self) {
println!("Meow!");
}
}

fn main() {
let dog = Dog { name: "Buddy".to_string() };
let cat = Cat { name: "Whiskers".to_string() };

dog.speak();
cat.speak();
}

Bypassing MDMs on Arm Macs With RecoveryOS

· 3 min read

MacOS has a implemented a new security layer for their new M1 Macs. If you were to buy a Mac owned by a company that closed its doors and can not disable the MDM system, you would have some options on the Intel platform. Bootable USBs make it easy to reinstall MacOS, Windows, or Linux. With the new Macs, you would be left with a paper weight. This is not a perfect fix. After every major update, the MDM enrollment can reactivate. Rebooting can also lead to the same results and render the Mac useless.

Often times, companies sell Macs without removing the MDM or they go under and sell off their computers in bulk and forget about it.

Initial Boot into RecoveryOS

  1. Hold down the power on boot up and select RecoveryOS
  2. Launch the terminal

Disabling Platform Integrity Protection

PIP is a security mechanism that helps prevent unauthorized modifications to the system software and firmware. It's designed to protect the device from malicious software and unauthorized access. It really focuses on three things to ensure system integrity:

  1. Prevents Unauthorized Modifications: PIP prevents unauthorized changes to the system software and firmware, including the kernel, drivers, and system extensions. This helps protect the device from malware and other security threats.
  2. Enforces Code Signing: PIP requires all system software and firmware to be digitally signed by Apple or an authorized developer. This ensures that only trusted code can be executed on the device.
  3. Protects Boot Process: PIP protects the boot process from unauthorized modifications, preventing attackers from gaining control of the device before the operating system loads.

Here is some more info: https://support.apple.com/en-us/102149

In the terminal we can disable PIP:

csrutil disable

Edit Managed Client Property List

A property list is a file format used by Apple to store configuration data and settings for various applications and system components on MacOS.

They are used frequently in MacOS, we can see just how many starting at root here:

image

That's a lot of property lists. We can edit the property list that contains data about mobile device management.

sudo vi /System/Library/LaunchDaemons/com.apple.ManagedClient.enroll.plist

We need to change

<key>com.apple.ManagedClient.enroll</key>
<true/>

to be

<key>com.apple.ManagedClient.enroll</key>
<false/>

Blocking Additional Apple Servers

0.0.0.0 iprofiles.apple.com
0.0.0.0 mdmenrollment.apple.com
0.0.0.0 deviceenrollment.apple.com
0.0.0.0 gdmf.apple.com
0.0.0.0 acmdm.apple.com
0.0.0.0 albert.apple.com

Disable the Enrollment Service

sudo launchctl disable system/com.apple.ManagedClient.enroll

Additional Resets

# Resets the cloud configuration activation status.
sudo rm /var/db/ConfigurationProfiles/Settings/.cloudConfigHasActivationRecord

# Forces a re-search for cloud configurations.
sudo rm /var/db/ConfigurationProfiles/Settings/.cloudConfigRecordFound

# Indicates that a cloud configuration profile has been installed.
sudo touch /var/db/ConfigurationProfiles/Settings/.cloudConfigProfileInstalled

# Indicates that a cloud configuration record was not found.
sudo touch /var/db/ConfigurationProfiles/Settings/.cloudConfigRecordNotFound